Tuesday, June 24, 2014

Petal Pusher: Small Planters with a Punch!

I just saw my Planter story in Denver's city magazine, 5280. I loved this story when it was pitched to me: a fun roundup of garden planters that are great for a small terrace, outdoor console, or even in your house. I can think of a thousand ways I'd put my planters to use sans fleurs-- a cute ceramic crock for cooking utensils, displayed on a book shelf, a great catch-all for keys, etc in your entry way, even lined along a buffet to stash napkins and flatware during a dinner party.


photo by Jeff Nelson

From left:
Pinched Garden Pots, $28–$38,  anthropologie.com
Plum & Bow Large Fade Out Vase, $34,  urbanoutfitters.com
Biltmore Pot in Aqua, $50, bauerla.stores.yahoo.net
Global Views Banded Ceramic Vases in White, $48–$98, shopcandelabra.com
Neptune Cachepot, $172.50, interiorhomescapes.com
5280.com
Galvanized Metal Cachepot, $29.50, potterybarn.com


Monday, June 23, 2014

Easy, DIY Up-Do

If I see another Pinterest board with the words "Easy Up-Do" I might throw up in my mouth. Lies! All of them lies! Calling something "an easy up-do" is the hair equivalent of 5 minute abs. Sounds too good to be true. Is too good to be true.

Let's think about this for a second. The entire premise of an updo usually means that it's a night where you want too look extra fab and in order to do so, you must sculpt thousands of little hairs into an artful shape (most likely having little hair-sculpting experience). Your main sense of sight is completely eliminated, so you're relying on your sense of touch to confirm whether you're on the right track. All the while, working with your hands upside down. That's why, nine times out of 10, I attempt hair tutorials, accept defeat, and usually walk out of the door with top knot. Until now!

If you haven't checked out The Beauty Department, I highly recommend it! They have some really amazing hair tips (I'll post their curling iron guide soon) that are actually doable. But this little gem is my new go-to. And literally took me five minutes on my first attempt and I didn't have to redo it! I'll post their's because their images are better and I'll show you what mine ended up looking like.


 Here are the steps they wrote and I've added some notes in pink that helped me.

You will need: 2 clear elastic ponytail holders, one regular ponytail holder, bobby pins and some strong holding hairspray.
  1. I like to give my hair a little wave before starting most updos but this one in particular. For this I used a 1 1/4″ barrel iron. I skipped this step because I was in a hurry and didn't really care if it was perfect. 
  2. I wanted the crown of my hair to have extra volume (think, sophisticated bump it-- just a little lift-- no Snookie territory) so I teased my crown just a bit and pinned with bobby pins for a small section almost like a "half-up half-down" look just at the base of the crown. The next step covers those bobbies. 
  3. Take a small section from each side near the temple. Join the two pieces in back and wrap one of the clear elastics around it.
  4. Now “topsy turvy” the pieces(Aka: flip the ponytail over itself and feed it through the loop. That will create more of a twist than just two pieces joined together.) Flash back to 4th grade! My sister wore her hair like this every day. Along with her signature mix-matched color high tops and Umbro shorts. Every day. No exception. 
  5. Repeat the process just below with two more pieces, closer to the ear.
  6. Now take the remaining hair that’s down and create a half ponytail bun. That’s where you make a ponytail but on the last loop you only pull it half way through. This is where I used a regular pony tail holder. 
  7. Now grab the tail that’s hanging out. Twist it and wrap it around the base of the bun. Get a little messy with it! 
  8. Pin it in place with some large bobby pins for extra security.
  9. The final step is to tug on the topsy turvy twists until the clear elastics move down and hide themselves in the next section below. They should slide and hide pretty easily.
Check the back in a mirror for balance and spray all over using some strong holding hairspray. 
Here's my version! 


Friday, June 20, 2014

Cabana Crush: Poolside at The Raleigh

Tomorrow is officially the first day of summer! (I say that with equal parts joy and trepidation. After living in Colorado for the past two years, I can already tell that I quickly forgot how hot the south can be. I think the Bible Belt South has the most Christians because we all grew up having a slight idea of what spending eternity in hell would actually be like.) Enough about hell and humidity. I give you the most heavenly version of summer imaginable: Poolside at The Raleigh. Nothing that has been, or will ever be, will top this caipirinha-sipping, fringed cabana chilling Miami oasis.


Bon weekend! 

Thursday, June 19, 2014

Best of the Web: Espadrilles

When it comes to doing market work for magazines, sometimes they'll ask you to give them multiple story pitches (aka, the most intense form of web shopping/stalking imaginable). It's not for the faint of heart. Have you ever pilfered through Etsy in search of one, JUST ONE, handmade item from West Virginia that is actually cool? I have. And it's virtually impossible. I will say, West Virginia produces a large crop of crotched pot holders. And other flat crotched items... door mats, pot trivets, "decorative" wall hangings. Use your imagination. So if you're ever in the market for that, West Virginian Etsy shops are your ticket.

Recently, a magazine asked me to pitch them two different trends and they were going to pick their favorite of the two roundups: espadrilles and circle skirts. Circle skirts won (check out the August issue of Country Living!) and espadrilles got the chopping block. I hated to see all of these cute, summery flats go to waste, so I thought I'd share some of my favorites with you. Espadrilles are huge in my book for two reasons: 1) they're classic but not too stuffy 2) they're cheap. Most of the time, you're looking at $45-$120. If it's a higher end designer, $300. Still doable.


1 // 2 // 3 // 4 // 5 // 6 // 7 // 8 // 9 // 10 // 11 // 12 // 13 // 14 // 15 // 16 // 17 

Friday, June 13, 2014

Makeover: The Office Nook


For all of you work-at-homers, you understand what I'm talking about... the. need. for. pretty. Essentially, I feel like the hermit crab version of a human. I live, eat, work, and sleep in my little shell. And I want my shell to be pretty. Is that to much for a gal to ask? I think not! 

When I lived in Denver, I was never planning on working from home so I didn't have a designated office space. My office was my dining room table. Not bad, but a little JV. When I moved to Nashville I knew it was time for a grown-up office space that actually looked like... well, an office. When it comes to decorating, I tend to have these ideas of grandeur and can dream up a look in my mind that would put your Pinterest board to shame. But then Grim Reaper of creativity and all things pretty swings his axe and dashes my dreams: renter contracts. The words "command strips," "spackle," "neutral paint," and "no paint," make me throw up in my mouth a little. It's like living in a bandaid. Tan walls full of adhesive strips. I can't take it anymore! 

Enough with my diatribe. Onto the fun stuff! My house hunt in Nashville was short and sweet. The first friend I called connected me with my current roommate. She had one empty bedroom in her house and lo and behold, it had an office nook! With beadboard walls. And the kicker? She was ok if I painted! PFJ (Prize from Jesus)!!! I signed on the spot. Here's where I am currently shaking my money maker:


before


As you can see, the nook is framed off from the bedroom, which is nice because it naturally has it's own defined space and therefore, I don't feel like I'm sleeping at the foot of my desk. How depressing would that be? I'm pleased to say, workaholism is something I've never struggled with.


I started taping off the beadboard to paint stripes. FYI: I've done stripes before. It's doable but definitely requires some serious measuring, taping, etc, and can be super tedious. However, beadboard is like painting stripes for dummies because it's already perfectly lined out (literally) for you. If you've ever had an itch to paint stripes but are hesitant and happen to have beadboard as an option, start there! Stripes definitely take longer than just painting a wall a solid color, but the bonus is that you use half the paint.

after


source list
most all of this was done on a budget and you'll be surprised how affordable it really is! 
-paint: Farrow & Ball Skylight (don't want to splurge on FB? Just take the color number to 
Home Depot. They've got the color codes and will mix it with a cheaper paint formula. 
Costs a fraction of what the real deal would.)
-desk: Ballard Designs (no longer available). For a similar look (and actually, probably an ever better look!) try vintage stores. Circa Who in Palm Beach is always loaded with good bamboo furny. Ballard has a great bamboo desk chair for the similar look. Here's a new option but not so cheap. 
-chair: I originally saw this chair on PB Teen and it was $170 ish... a quick google search and wha da ya know? Overstock had the same one for $100 bucks. Done. Plus free shipping. Double done. (the price went up a tad but still a great deal.)
-rug: Ballard was also having a huge rug sale at the time of my move. The color was unintentional. I thought I was buying the tan sisal version but I ended up getting grey. But I liked it, so she stayed. 
-pendants: This was also a Pottery Barn find. They were $200 each so I looked around and found them on ebay for around $150 a piece. If you search "capiz pendant," you might be able to find a cheaper option too. The plugin option is great because it meant no hard wiring!
-lucite desk accessories: The Container Store. They're actually from the bathroom section but I liked them for my desk. 
-laptop butterfly decals: I almost died when I saw these on LuluDK's Instagram. Butterflies are my PFJs-- they're like little smiles that God gives me during my day. When I see one, they remind me that the little things in life aren't worth stressing over. You never see a stressed out butterfly. So I thought the best place for them to live was in the eye of the stress storm: le laptop. 
-le pen: if you don't know what I'm talking about, buy this now. If you do know, then you get it. The one "office supply" I can't live without is le pen. A) they write so smoothly. B) they come in every color of the rainbow. C) the tip is the perfect fineness v thickness ratio. D) I think they're laced with prosecco, gardenias, and sea salt dark chocolate because the happiness they bring me is insane. I found a ridiculous deal for an 18 pack on Amazon. Normally they're about $3 each at a stationery store.
-dog bed: fleur's dog bed was a happy accident. I actually had three pillows made for my bed but once I got them home, it looked better with two. Voila! "Free" dog bed. The fabric was super cheap-- $20 ish a yd-- by Magnolia. If you want details, let me know and I'll look. I added tassels to the corners for a little extra fun. Tassels always make things better. 
-art: I got these birds on a trip to China. They were actually hand-painted on linen and glued to cards. I bought them initially to write thank you notes. And you know how that goes. The notes never got written. So what would any resourceful procrastinator do? Find a way to turn them into a present pour moi! Hence, artwork. The pink mat and gold frame really make it pop.


Wednesday, August 7, 2013

Blushing Bride: Get The Look

all images courtesy of Simply Bloom Photography

Who doesn't want to look like a freaking bride? Any girl with an ounce of honesty, whether she's 6 or 66, wouldn't turn that down. I love how CJ's makeup turned out for her wedding. It you looked up classic bridal beauty this would be the picture next to it. No too much, but just enough. Her eyes are just captivating and everything else has a subtle, flawless radiance.


PRODUCTS


Here's what you need to get her look:

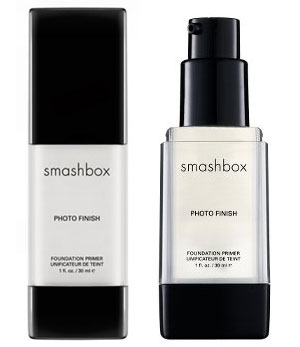
1. Smashbox Photo Finish primer. This primer has a light-reflective property so the flash of a professional camera doesn't skew the undertones of your foundation (aka, no clown face). 


2. Dior Airflash Foundation. It's in an aerosol can, so you get a weightless foundation that's much lighter. It was raining, so I didn't want to worry about the extra moisture from the humidity causing her foundation to run. I set it with a clear, translucent powder afterwards to reduce shine and create a long-lasting finish. 


3. Bobbi Brown Cream Blush. Ironically, cream blushes are great for humid weather because the cream formula dissolves into skin unlike a powder, which just sits on the surface. This Bobbi Brown color is called Pale Pink but I think it has a subtly bright pink undertone. More than anything, it's just the perfect, natural flush. Screams "wedding day." 

4. Dior Bronzer. On your wedding day, or any time you'll be in front of a camera flash, make sure that you use shimmery products sparingly. Lots of bronzers and highlighters have sparkle or shimmer, which will in turn make you look like a glitter bomb fairy. So, opt for matte bronzers and highlighters (here's the highlighter we used). We defined CJ's cheek bones and face by sweeping bronzer in the shape of a 3. Starting at her hairline to her temples, under her cheek bones, and feathering it out under her jawline. 


5. Dior Quad Shadow. We focused on keeping her lid soft. In our trial run, we did a heavy crease with a smokey-eye effect but on the day of, it didn't feel right so we went for a subtle shimmer, using pearls and pale pinks. It's great for brown eyes. We swept the bottom right shadow under her brow bone and around the inside corner of her eye. Then we brushed the center pink color over her entire lid and warmed up her crease with the gold. 

6. Revlon Liquid Liner. My must have drugstore obsession. For a liquid liner, it's fool proof and never bleeds. Great if you tend to be a bit weepy :)


7. Tons of mascara and fake individual fake lashes. I like to layer Maybelline's Volum Express Waterproof mascara with Dior Show. You get the megawatt volume of Dior Show with the protection of a waterproof mascara. Here are my falsies I like. Get them at any drugstore. Always buy the medium length. 


Friday, August 2, 2013

Drink the Haterade: Wedge Sneakers

First of all, it's the weekend! So raise your glass, and cheers to taking a big gulp of ice cold haterade! I opened my inbox this morning and numerous emails from various fashion retailers and website flooded my inbox with the "hottest fall footwear deals." I got so excited thinking I'd see pages filled with color-blocked heels, suede booties, and tailored leather boots. Instead the two styles that were most prevalent were moto boots (not my thing, but I could see it if you had a Stevie Nicks/rocker edge) and-- gasp -- wedge. sneakers. Seriously? There are certain things that only rappers and Real Housewives of New Jersey are allowed to wear.  Wedge sneakers are one of them.  Note: all of the shoes below came from Saks and none cost less than $300. Most were between $500-$800. I just don't get it. I guess I'm officially behind the times.